
How to Fix: CS:GO “VAC Unable to Verify” Error - Complete Guide
- “VAC was unable to verify your game session” is one of the most common and annoying errors in CS:GO.
- No one knows why or how does this error occur and there is no set solution to resolve this error.
- Read on to find out how to solve this error by following a few simple steps and what exactly does this error mean.
“VAC was unable to verify your game session” is one of the most common and annoying error that a CS:GO player comes across quite frequently. Most of the CS:GO players go into a state of panic when they come across this particular error due to the presence of VAC (Valve Anti Cheat). But in reality, there is nothing to worry about unless you are running any sort of a script or cheat to give yourself an unfair advantage. “VAC unable to verify” is an error that mostly occurs after a patch update or if you have been tinkering around with the game files, having said that it is also quite easy to fix it and in most cases, the game will be up and running properly within minutes.
Here are some simple ways through which you can fix the “VAC unable to verify your game session” error, as we also try to explain what this error actually means, and the reason behind why do they randomly occur out of the blue. So follow the solutions given below to get rid of the error and resume playing CS:GO.
RELATED: Best CS:GO Launch Options 2021: Boost FPS, Increase Performance, Optimal Settings
What is “VAC unable to verify” CS:GO error?
Despite being one of the most common CS:GO errors, the reason why it occurs is still shrouded in a veil of mystery. Valve has never given a reason as to why it happens and honestly, users do not even know how it occurs, it just randomly strikes a system and locks down matchmaking for that particular user. The fact that there is no proper solution to this problem makes it a very annoying error, that has been impacting players globally for many years.
The only understanding of the error is that it is related to the Valve Anti Cheat (VAC) system, which has been developed by Valve to protect its userbase from cheaters. There seems to be some sort of an unexplained bug due to which this very system at times, locks out legit users and restricts them from CS:GO matchmaking unless the “VAC unable to verify your game session” error is rectified.
Different ways to fix “VAC unable to verify” CS:GO error
As the error in itself is not completely known, there is no proper solution to the problem. So users can follow the steps listed below, in this very order, and it is bound to fix the problem sooner or later.
1. Restart Steam Client
The very first thing that you should do after facing this error is, simply quit CS:GO, log out of your Steam account, close the application, and then open it again. In most cases, this step is enough to fix the error as sometimes there may be some changes in the ‘operating system framework’ which may lead to the “VAC was unable to verify your game session” error.
- Open 'Steam'.
- Click your profile name at the top right corner of Steam. Then click on log out from the drop-down list of options.
- Click ‘Logout’ when the pop-up window asks for permission.
- Quit ‘Steam’ and close the application from the ‘Taskbar’.
- Double click on ‘Steam’ to restart the application, ‘Login’ to your account, Open ‘CS:GO’.
If the error is gone then this method was a success, otherwise, you can move on to the next solution.
2. Restart The PC
Well, if you have restarted CS:GO and Steam, but the error has still not fixed itself, then the only logical step is to restart the system once. While this may not seem like the ideal solution, simply restarting the PC fixes a lot of issues as all the active and passive programs are closed down during this process, and it may automatically fix the problem.
Launch Steam once again and open CS:GO, if the problem still persists then try out our next solution.
RELATED: How to Set Dot Crosshair in CS:GO 2021 - Settings and Console Commands
3. Verify Game Files
This is the step that almost always solves the “VAC was unable to verify your game session” error, as this method helps retrieve lost game files and replaces any that may have been corrupted. Here is how you can verify your game files via Steam.
- Open ‘Steam’, click on ‘Library’ present on the tool bar above.
- Search for the game ‘CS:GO’ and right-click on the game title. Then click on ‘Properties’.
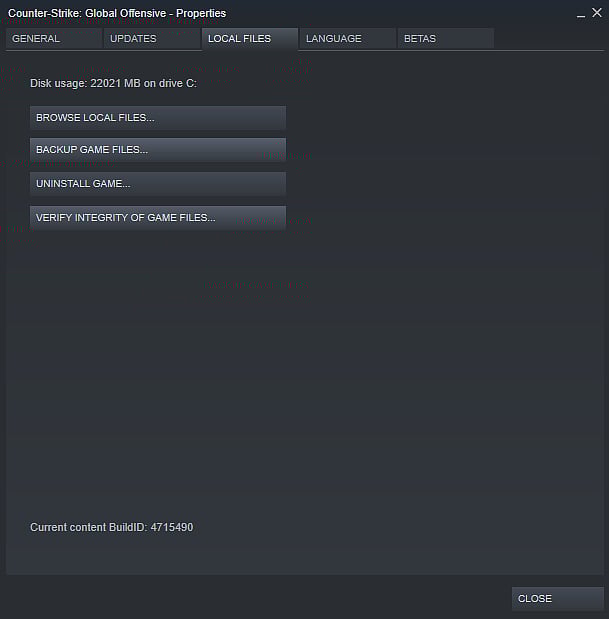
- Under ‘Properties’ click on the ‘Local Files’ tab present on top, and then click on ‘Verify Integrity Of Game Files’.
- As soon as you press that option, the system will start going through all the game files automatically carry out any necessary procedures requires to fix them. This may take several minutes to complete, after which a new dialogue box will pop-up and you can click ‘Close’.
Now that you have diagnosed all the game files and have successfully run a check, launch CS:GO once more and see if the error still persists or not. If the error still persists then move on to the next solution.
4. Update Device Drivers
Certain corrupted or outdated device drivers may sometimes cause this CS:GO error to crop up, especially the drivers related to the graphics card and sound card. So updating and fixing these drivers can also help in solving this issue.
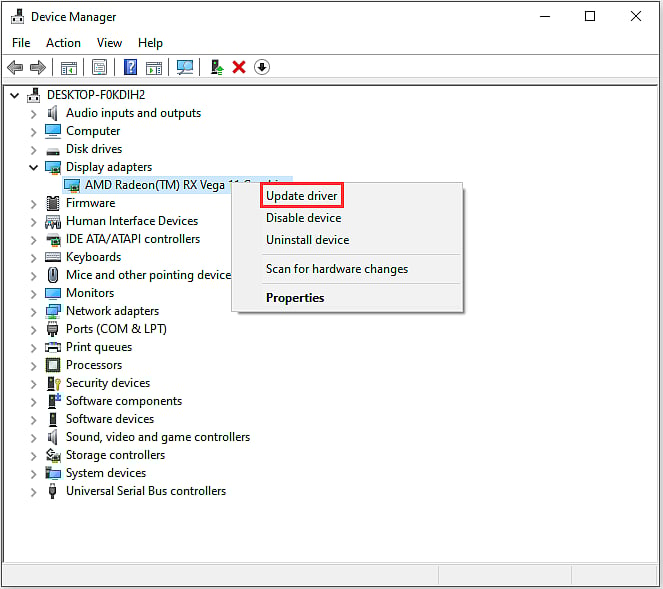
- Press 'Win + R' to open the ‘Run Window’. Then input 'devmgmt.msc' and click ‘Ok' to enter ‘Device Manager’.
- Double-click ‘Display Adapters’ to expand it.
- Now right-click your graphics card and select ‘Update Driver’. Then, choose ‘Search Automatically’ for updated driver software and follow the onscreen instructions to finish the process.
This should be the final attempt to fix the error and if it still persists then the last solution is, unfortunately, the only thing that the user can do.
5. Reinstall CS:GO
If all the above solutions have failed then all that a user can do is go to the ‘Control Panel’ or through ‘Steam’ itself, uninstall CS:GO and then reinstall it once again. No player wants to do this as it is quite a time-consuming process and also really annoying. But sadly, if none of the above steps works then a user has to forcefully go ahead with this.
Reasons why “VAC unable to verify” CS:GO error occurs
While there is no exact reasoning behind this error, there are a lot of assumptions and usually working on fixing these issues tends to solve the error as well.
- When the Steam client is not performing as it should, then there is a possibility for you to get this problem. This may happen right after a CS:GO patch update or client update.
- If the verification of CS:GO game files is not complete, then also you might encounter this error.
- When the Steam client program files have gone missing or somehow got corrupted somehow, then this issue might crop up.
- If the Windows OS or the drivers are not up to date, then also you can face this issue.
Once the “VAC was unable to verify your game session” error is fixed, the user will be able to once again join the matchmaking queue in-game and everything else will start functioning normally. But there is always a chance that this error may strike again unexpectedly, upon which the user can once again follow these steps to solve the problem.
RELATED: CS:GO to Valorant Reversible Sensitivity and FOV Settings Guide
